Section 1
:: Intro
:: DW Interface
:: Defining
a site
:: New Document
Section 2
:: Inserting and formatting text
:: Bullets and Lists
:: Hyperlinks
Section 3
:: Tables
:: Images
Section 4
:: flash buttons
:: Resizing Elements
:: horizontal Rules
Section 5
:: Behaviours and Interactivity
:: Roll Overs
Section 6
:: CSS
:: Frames
Section 7
:: Templates
:: Library Items
:: Uploading to a Web Server
:: Keyboard Shortcuts
Dreamweaver 8 Notes -Section 1:: Intro :: Dreamweaver Interface :: Defining a Site :: Creating a New Document :: |
Section 1 |
Defining A Dreamweaver Site
THIS IS ONE OF THE MOST IMPORTANT ASPECT OF WEB PAGE CREATION IN DREAMWEAVER
Site planning and design
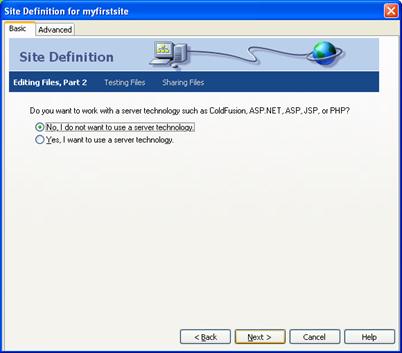
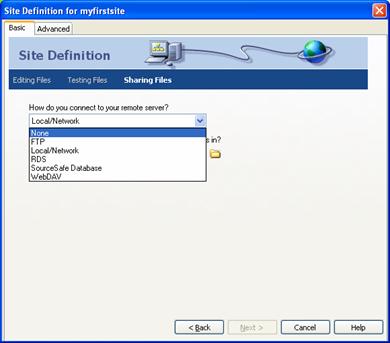
In Dreamweaver, the term site can refer either to a website or to a local storage location for the documents belonging to a website. Organizing your files in a site enables you to use Dreamweaver with FTP to upload your site to the web server, automatically track and maintain your links, manage files, and share files.
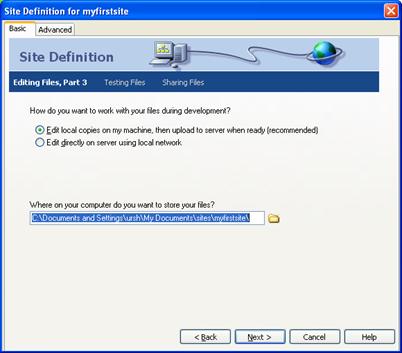
A Dreamweaver site consists of as many parts, depending on your environment and the type of website you are developing the most important are the local folder and when you are ready to publish your site to the internet the remote folder:
- Local folder is your working directory. Dreamweaver refers to this folder as your "local site." All files associated with your site should be stored in this folder in an orderly folder structure eg all images should be in an images folder.
- Remote folder This is normally the folder on your web host where your files sits so it is available to the public viewing your site on the internet
Dreamweaver 8 Interface
(click on the interface image for a larger version that you can printout)
The Insert Bar contains buttons for inserting various types of "objects," such as images, tables, and layers, into a document. Each object is a piece of HTML code that allows you to set various attributes as you insert it. For example, you can insert an image by clicking the Image icon in the Insert bar. If you prefer, you can insert objects using the Insert menu instead of the Insert bar.
The Document toolbar contains buttons and pop-up menus that provide different views of the Document window (such as Design view and Code view), various viewing options, and some common operations such as previewing in a browser.
The Document window displays the current document as you create and edit it. You can choose any of the following views:
- Design view, a design environment for visual page layout, visual editing, and rapid application development. In this view, Dreamweaver displays a fully editable, visual representation of the document, similar to what you would see viewing the page in a browser. You can configure the Design view to display dynamic content while you're working on the document.
- Code view, a hand-coding environment for writing and editing HTML, JavaScript, server-language code-such as Microsoft Active Server Pages (ASP) or ColdFusion Markup Language-and any other kind of code.
- Code and Design view allows you to see both Code view and Design view for the same document in a single window.
To toggle quickly between the two views, press Control + tilde (~).
The Property inspector lets you view and change a variety of properties for the selected object or text. Each kind of object has different properties. It is context sensitive eg it will show you different properties depending on what is selected.
The Tag selector in the status bar at the bottom of the Document window shows the hierarchy of tags surrounding the current selection in Design view. Click any tag in the hierarchy to select that tag and all its contents.
Panel groups are sets of related panels grouped together under one heading. To expand a panel group, click the expander arrow at the left of the group's name; to undock a panel group, drag the gripper at the left edge of the group's title bar.
The Site panel allows you to manage the files and folders that make up your site. It also provides a view of all the files on your local disk, much like Windows Explorer.
This screen summarizes your site definition parameters.
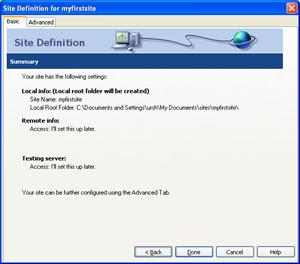
-Click Done
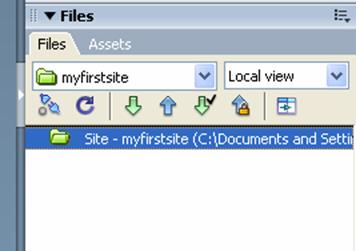
Your new site appears in your Files panel and is your currently selected Dreamweaver site.
Creating a new document
-Choose File > New The New Document window will open. -Select Basic page from the Category list. -Select HTML from the Basic page list. -Click Create |
 Click image for larger view |
A new document will open, but it is not yet saved. For Dreamweaver to manage your files and assets, the file must be saved in the site.
So click File > Save and name it appropriately