Section 1
:: Intro
:: DW Interface
:: Defining
a site
:: New Document
Section 2
:: Inserting and formatting text
:: Bullets and Lists
:: Hyperlinks
Section 3
:: Tables
:: Images
Section 4
:: flash buttons
:: Resizing Elements
:: horizontal Rules
Section 5
:: Behaviours and Interactivity
:: Roll Overs
Section 6
:: CSS
:: Frames
Section 7
:: Templates
:: Library Items
:: Uploading to a Web Server
:: Keyboard Shortcuts
Dreamweaver 8 Notes -Section 5::Interactivity & Behaviours :: Rollovers :: |
Section 1 |
Adding Interactivity
Behaviors add interactivity to a page by enabling the user to change or control the information they see. A behavior consists of an event (such as clicking a mouse button) and an action (or multiple actions) that respond to the event. Behaviors are prewritten using JavaScript code. You can specify more than one event to trigger a behavior, and you can specify more than one action for each event.
One common use of behaviors is to create rollover buttons. A rollover is an image that changes appearance when the mouse pointer is moved over the button or when it is clicked.
Creating a rollover image or button:
- Create each image the same width and height. If they are not the same size, Dreamweaver will resize the second image to be the same size as the first, which can cause a distorted image.
- Make the buttons as small as possible. With rollover buttons, you are downloading two images, not one.
It is easy to add rollover behaviors using Dreamweaver Rollover Image command.
- Open your Dreamweaver document and place the insertion point where the image is to be placed.
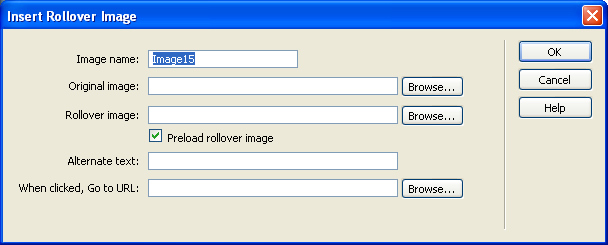
- Click the Insert menu-- Image Objects, then click Rollover Image to open the dialog box.
- Assign a name to the rollover image. This name must be unique.
- Click the Browse button next to the Original Image text box and locate the first image file.
- Click the Browse button next to the Rollover Image text box and locate the rollover image
- After selecting both the original and the rollover image, click the Preload Rollover Image check box to select it.
- Add descriptive text in the Alternate Text text box (optional but recommended).
- Click the Browse button next to the When Clicked, Go To URL text box. Locate the file to link to when the button is clicked.
- Close all dialog boxes, save, and test your file in your Web browser.
You can add behaviors to images or objects already on your page by:
- Selecting the image and assigning it a name in the Name text box of the Property inspector.
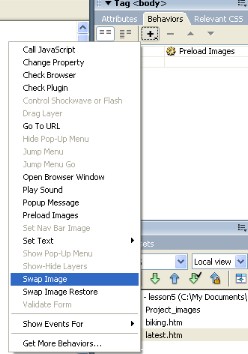
- Clicking the Window menu and then clicking Behaviors to open the Behaviors panel.
- Clicking the Actions button (+) and then choosing Swap Image from the pop-up Behaviors menu.
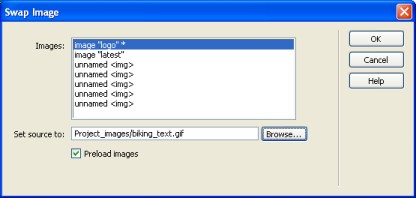
- Clicking the Browse button and locating the rollover image file.
- Closing the dialog boxes, then saving and testing your file.
 |
 |
- The top portion contains events that can be directly attached to an object.
- The lower portion shows events that need an anchor placed around the object.
- The Events pop-up menu appears only after you have added an action and select the event.
- Click the second image to be swapped to select it and assign a name to it.
- Select the image that already has a behavior applied to it and double-click the Swap Image action in the Behaviors panel.
- Select the name of the image you just assigned, click the Browse button, and locate the image to be swapped.
- Close the dialog boxes and test your file in the browser window by pressing the F12 key. When you roll over the button, the button should change and so should the second image.